Friday, December 10, 2010

Chocolate Walnut Fruitcake

This is a very old recipe that I got from my mother~in~law.
She has been making it for years.
While not a big fan of fruitcake, I do enjoy a slice of this one
at this time of year.
Do you like fruitcake?

Mine ~ fresh from the oven
waiting to be sliced tomorrow
at our ladies Christmas Party!
I should have baked it last week
but didn't read thru the recipe.
I'll know next time!

Chocolate Walnut Fruitcake
2 1/4 C. flour
1 1/2 C. sugar
1/2 C. unsweetened cocoa
1 t. baking soda
1 t. salt
1 1/2 C. coarsely chopped walnuts
2 C. diced mixed candied fruit
1 C. raisins
1 C thinly sliced pitted dates
2 eggs
1 C. sour cream
1 t. vanilla
1/4 C. melted butter
Generously grease a 9-inch tube pan
On waxed paper, sift together the flour, sugar, cocoa, baking soda and salt.
In a separate bowl, mix together the walnuts, candied fruit, raisins and dates.
In a large mixing bowl, beat eggs, sour cream and vanilla until blended. Add butter, then flour mixture and blend well. Beat with electric mixer at medium speed for 1 minute or vigorously by hand until well blended. Add walnut/fruit mixture and fold in until well distributed. Turn into prepared pan.
Bake in a preheated 300* oven with a shallow pan of hot water on the floor of the oven until a cake tester inserted in center comes out clean ~ about 1 3/4 hours.
Cool inn pan, placed on a wire rack for 10 minutes. With a small spatula, loosen edges and around tube.
Turn out on a wire rack and cool completely.
If cake is to be served shortly after baking, it will nave to be cut in thick slices and it will not have the traditional fruitcake texture. To have the cake change so the texture is beautifully moist and it may be cut in thin slices, wrap in transparent plastic wrap then place in a plastic bag and refrigerate for a week or so before using; may be stored this way for weeks and even months.
Before serving, slice cake when it is taken from the refrigerator, and arrange on serving plate, then let stand at room temperature for 10 minutes or so before offering.
Makes a 3 pound fruitcake.
(NOTE: For the mixed candied fruit, we used candied cherries and pineapple and found this a delightful combination!)
~
My mother-in-law bakes hers a couple months before giving.
While it is 'ripening' in the refrigerator,
she lays a wine soaked cloth on the top and refreshes it weekly.

Saturday, November 27, 2010

Icebox Butterhorns

The counter was filled with the pre-assembled dishes of
dressing, green bean casserole, and Icebox Butterhorns.
My little Granddaughter wanted to help with the rolls
because she knew how to do them!
(She must be helping Mama alot! She did an
excellent job of rolling up the dough!)


(Please disregard the unfinished cupboard beneath the
oven. Hopefully the doors will be put back on before
Christmas. And maybe even the rest of the cupboards
will get painted!)


They must have been good! This is Miss R's
second roll!
~*~
Icebox Butterhorns
1/4 ounce active dry yeast
2 Tablespoons warm water (110* to 115*)
2 cups warm milk (110* to 115*)
1/2 cup sugar
1 egg, beaten
1 teaspoon salt
6 cups flour
3/4 cup butter, melted
In a large mixing bowl, dissolve yeast in water. Add milk, sugar, egg, salt and 3 cups flour; beat until smooth. Beat in butter and remaining flour (dough will be slightly sticky). Do not knead. Place in a greased bowl. Cover and refrigerate overnight. (I made the dough early in the day ~ only refrigerated for 4 1/2 hours. Still turned out!)
Punch dough down and divide in half. On a floured surface, roll each half into a 12-in. circle. Cut each circle into 12 pie-shaped wedges. Beginning at the wide end, roll up each wedge. Place rolls, point side down, 2 inches apart on greased baking sheets. cover and let rise in a warm place until doubled, about 1 hour.
Bake at 350* for 15-20 minutes or until golden brown.
Brush tops with softened butter.
Yield 2 dozen
(Recipe from an old Country Magazine
Judy Clark
Elkhart, Indiana)


Tuesday, November 9, 2010

Last Night's Dinner


Heavenly Hash Browns (recipe follows)

turkey patties (from this recipe)

cole slaw

and

Old Fashioned Gingerbread with Warm Lemon Curd

for dessert! (recipe follows)


~Recipes~
Heavenly Hash Browns
Into a 9X13 baking dish add
1 2lb. package of hash brown potatoes, thawed
(I used one with onion and peppers)
Pour 1/3 c. melted butter over spuds
Sprinkle with onion flakes
Over the top add ~
2 cans Cream of Chicken Soup
1/2 C. grated cheese
and
your favorite bread crumbs
Bake at 350* for 1 hour
~*~
Old Fashioned Gingerbread
Ingredients ~
1 3/4 cups plus 2 Tbsp flour
1 1/2 tsp baking soda
2 1/4 tsp ground ginger
1/2 tsp ground cinnamon
1/4 tsp ground cloves
Pinch of salt
5 Tbsp butter, softened at room temperature
1/3 cup sugar
1 large egg
3/4 cup Grandma's Molasses
3/4 cup cold water
Heat oven to 350*F
Grease an 8x8 pan.
Sift together the flour, baking soda, spices and salt onto a sheet of waxed paper. Set aside.
In a large mixing bowl, beat the butter until light and creamy. Add the sugar and continue beating until light and fluffy. Add the egg and beat until well combined. Scrape down the sides of the bowl and pour in the molasses in a slow, steady stream, beating all the while. Add half of the sifted dry ingredients and mix just until well combined. Mix in the remaining dry ingredients. Slowly pour in the cold water and stir until well incorporated.
Pour batter into the prepared pan and bake until a toothpick inserted in the center comes out clean, 35-40 minutes. Let cool in the pan about 1 hour before serving. Cut the cake into squares and dust with powdered sugar.
Or
you can do as I did and
top with warmed Lemon Curd.
You can find many recipes for Lemon Curd on the Internet.
I had been gifted a jar from Trader Jo's
so that is what I used.
Enjoy!
(Old Fashioned Gingerbread Recipe from Grandma's Molasses Web site)


Monday, October 11, 2010

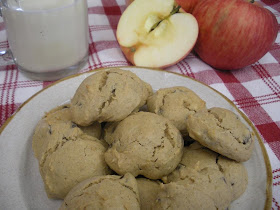
'Quick' Applesauce Cookies

Assemble your tools and ingredients:

1 cup packed brown sugar

1/4 cup butter, softened

1 egg

2/3 cup applesauce

2 1/2 cups buttermilk baking mix

1/4 cup flour

1 teaspoon cinnamon

1/2 teaspoon allspice

1/2 teaspoon ground cloves

1 cup raisins

~

Heat oven to 350*
Mix butter, sugar and egg
Stir in applesauce
then remaining ingredients.
Drop onto ungreased cookie sheet.
Bake 10-12 minutes or until lightly brown
Remove immediately from cookie sheet.
Cool.
Frost if desired.


(These would be great using farm fresh eggs,

homemade butter,

your own grapes dried for the raisins,

homemade applesauce

and a homemade buttermilk baking mix! They just wouldn't

be as quick! :~P )


Monday, September 13, 2010

Cinnamon Rolls

I have a confession to make!
I gave in to temptation
and made Cinnamon Rolls!
My penance is
extra, extra miles to walk this week!
But I enjoy walking so it was a win/win
situation!
Here's my recipe~
~*~
4 & 1/2 teaspoons yeast
dissolved in
1/2 cup warm (105*-112*)
~*~
Stir together
1/2 cup cooled, scalded milk
1/2 cup sugar
1 teaspoon Sea Salt
1/2 cup butter, softened
2 farm fresh eggs
~*~
Add
yeast/water mixture
&
2 & 1/2 cups flour
Beat until smooth
~*~
Add
2 - 2 1/2 cups more flour
until dough is workable.
~*~
Knead on lightly floured board until
smooth and elastic ~ about 5 minutes
~*~
Place in a greased bowl, turn dough and cover.
Let rise in warm place ( I use my oven pre-warmed
to lowest setting and then turned off)
until double in size,
about 1 hour.


Punch down dough and shape into a rectangle
approx. 9X15
Spread with butter (I used about 1/4 cup),
your favorite sugar (I used turbinato)
sprinkle with cinnamon (I used lots!)
Raisins are optional (but not at my house! They just
aren't proper cinnamon rolls without raisins!)
Roll up widest side.
Slice into 12-15 slices.
Place in 9X13 greased baking dish
Let rise in warm place 1/2 - 1 hour
or near the top of dish.

Bake 375* for 25 minutes


Frost with Cream Cheese Frosting:

1 carton whipped cream cheese
1-2 teaspoons vanilla
1 1/2 cup powdered sugar
Mix with mixer until smooth
and creamy.


YUMM!
:~P


Wednesday, August 11, 2010

Victorian Applesauce Cake

Because I made applesauce yesterday, I just had to make
this recipe from my Grandma's recipe box!


2 cups sifted flour
1 &1/2 cup sugar
1&1/2 teaspoon soda
1&1/2 teaspoon salt
2 Tablespoons cocoa powder
1/2 teaspoon each cinnamon, ground cloves, nutmeg, allspice
1/2 cup shortening (I use coconut oil instead of Crisco or butter)
1&1/2 cup applesauce
2 eggs
3/4 cup raisins
(recipe also calls for 3/4 cup of chopped dates. I didn't have any, and I don't care for them, so I used 3/4 cup dried currants instead.)
3/4 cup chopped nuts (I did not add because there are nuts in the topping. I prefer them there for a nice crunch that sets off the moist, tender cake!)
Sift flour (which has already been sifted once), sugar, soda, salt, cocoa & spices into a mixing bowl. Drop in shortening (or coconut oil). Add 2/3 of the applesauce and beat 150 strokes. (I'm not a Victorian, so I used my mixer! Beat until creamy.)
Scrape bowl often.
Add eggs and beat 250 strokes. (another minute or so)
Add remaining applesauce and beat 50 strokes.
(or until fully Incorporated with your mixer.)
Add dates, raisins and nuts.
Mix thoroughly.
Pour batter into a greased tube pan. (Again, I used coconut oil)
Sprinkle topping over batter.
(Topping = 1/2 cup chopped nuts [I used pecans] and 2 Tablespoons sugar)
Bake 350* for 1 hour to 1 hour and 25 minutes. Test with toothpick after one hour. Keep checking often. Don't over bake!

As with any spice cake, the flavor improves after a day ~
but who can wait!
Not me ~ this piece is still warm!
MMMmmmm! with a cold glass of milk!
;~P

Tuesday, August 10, 2010

Making Applesauce!

Today, I made up a couple of gallons of applesauce from our
Transparent Apples.
These are the first of our apples to ripen, here on the farm, and this is my
favorite way to eat them!
Start with washing, quartering and removing the
stems and cores from the apples.

Place your apples in a pan with a small amount of water
in the bottom, so apples don't scorch.
(Stock pot full of apples and about 1 inch of water. We like our sauce thin and
runny. If you like yours thicker, use less water, but watch carefully when cooking
so it doesn't scorch.)

Let apples simmer in the water and stir occasionally.
Cook until soft on medium/low heat.
This only takes about 15-20 minutes.

When soft, put apples and juice through a strainer/sieve.


Using the jelly strainer removes the skins and any
core/seeds that you missed.
(These apples don't make chunky sauce so we do it this way.
Another time I will make chunky sauce with different apples.)


When you have sieved all your apples and the sauce is still hot,
now is the time to sweeten, if you like.
The hot sauce dissolves the sugar.
I use organic sugar. Sometimes I leave it unsweetened if I
am going to use it in a recipe, but it is just too tart
for plain eating, for my taste, without being sweetened.

I add Cinnamon sometimes.


Cinnamon adds a darker color. (Applesauce will darken anyway
as it cools and is exposed to air ~ just like cut apples.)
Now you are ready to can or freeze your sauce.
I prefer to freeze mine because I have had trouble in the past, when
I can it, with the sauce unsealing half way through the year!
So, to make sure I don't loose any of this golden delight,
I freeze it in glass quart jars.

My favorite way to eat it, however, is hot from the pot!
And even sweeter when eaten from a vintage
Shenango Sauce Bowl on Auntie Emma's
vintage picnic table cloth! ;~P
(There's a bowl waiting for you, Michele!)

(Coming next time ~ Victorian Applesauce Cake)

Saturday, June 5, 2010

Making Yogurt!

Since I have been purchasing Whole Raw Jersey Milk
I have wanted to try making my own yogurt.
Gentleman Farmer takes yogurt everyday
in his lunch for work and it gets to be
quite expensive.
I looked at several recipes, and wasn't sure how to
keep mine heated during the 'ripening' process.
The milk needs to be held at 116* for 4-8 hours,
depending on the particular recipe.
Some called for a yogurt maker, or a crock pot, or
your oven and even an ice chest pre-warmed with hot water.
I was about to try the one with the ice chest
and remembered that
my little food dehydrator recipe book
said you could make yogurt in it.
I plugged it in and put a thermometer in to see what
the constant temperature would be and
it held at 118*. I hoped it would be close enough
and gave it a try.
Here is what I did:
~
Gathered my ingredients/supplies.
6 1/2 pint wide mouth canning jars with lids
(washed in hot soapy water and rinsed well)
Candy thermometer
1 quart fresh raw whole milk
1/3 cup powdered milk (for thickening. Some
recipes call for gelatin, but I didn't want to use that.)
1/3 cup organic sugar
(Could have used 1/4 cup real maple syrup or honey)
1/2 teaspoon real vanilla
1/2 cup live culture plain yogurt
Combine milk and milk powder into a large saucepan.
Heat to 180* at medium heat, stirring continuously
so milk does not scorch.
Remove pan from stove and place in sink of cold water
to cool to 116*. This does not take long.
Stir and watch that thermometer!
When it has cooled to 116*,
add your yogurt culture and vanilla
and mix well.
My culture never stirred in completely.
Pour into warm jars and set in the dehydrator.

Put on the top and wait!
(I remembered later to set the lids on the jars.)


I checked it after 4 hours.
I appeared a bit runny/watery.
I stirred it with a spoon and gave it an apprehensive
taste ~ It was good! Tasted like custard!
It didn't have much 'tang' yet so I left it
another 1 1/2 hours.
Then I put it in the refrigerator overnight.
It needs to be refrigerated for at least 8 hours for best texture.

Gentleman Farmer had it for breakfast this morning with
a bowl of granola.
He gave me a kiss afterward and said,
"Thanks for the delicious breakfast!"
;~D
I will be making my own yogurt from now on!
~*~
You can use any type of milk; whole, raw, organic,
low fat, even powdered or canned.
Just be sure the yogurt that you use for
your culture has live bacteria.
~
It can be mixed with fruit, berries or jam
for a variety of flavors.
~
Please let me know if you make your own yogurt
or if you try making some!

Friday, May 28, 2010

Making Butter

Here is the gallon of raw whole milk I bought
from the Dungeness Valley Creamery.
(All Jersey Milk)
The cream is at the top 3 inches of the jar.
I spooned off the cream into a 1 quart canning jar,
placed on a lid, and let 'ripen' for a couple of hours.
(I would have just set it on the counter, but we went for a visit
to Farmer's Daughter #1 two hours away, so
it rode in the car with us.) The granddaughters love butter!
Their Momma says they lick the butter off their bread and ask for more!
I thought they might enjoy some fresh, homemade butter!


We shook the jar of cream for approximately 30 minutes.
(The Gentleman Farmer, grandaughters and I took turns)
After about 25 minutes, the cream started to thicken a bit
and collect alittle on the sides of the jar.
Keep shaking!
Then suddenly there was a golden lump forming in the
sea of cream!
I poured the 'buttermilk' into a separate jar, and put the
butter into a bowl of cold fresh water. I pressed the butter with
a large spoon to remove more of the buttermilk, changing the water
a couple of times until it was clear.


Then I put the butter into another bowl and added
sea salt to taste.
It was covered with waxed paper and put into the
refridgerator to be slathered onto the morning's
breakfast.


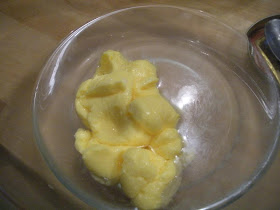
It made a little more than 1/2 cup of delicious, sweet cream butter!


Monday, April 26, 2010

Nanaimo Bars

Wanting to try something different from my usual chocolate chip, peanut butter or oatmeal raisin cookies for Gentleman Farmer's lunch (and a little snack for us both on Sunday evening) I ran across this recipe in my file (box full of copied recipes!) and decided to try it. Gentleman Farmer and I have been tossing around vacation ideas and the San Juan Islands have popped up a time or two. Naniamo is a Canadian Island near the San Juans and in my creative madness, thought these would be the cookie I would try! Is this making any sense to you? I didn't think so. But here is the recipe as I have found it in my stash, from the Food Network Kitchens.
+++++++
"There are a number of stories as to where this cookie came from. It's thought to be native to Nanaimo, British Columbia (hence the name), and it gained widespread popularity in the 1950's. Whatever its origins, we love it. We added the twist of peanut butter to make a simple, delicious, no-bake bar cookie that's super kid-friendly and freezes well."
~
Cookie:
1/2 cup (1 stick) butter
1/4 cup sugar
1/3 cup cocoa
1 large egg, beaten
1 3/4 cups graham cracker crumbs
1 cup shredded sweetened coconut
1/2 cup finely chopped blanched almonds
(I didn't have almonds but used pecans instead. They were good!)
~
Peanut Butter Filling:
1/3 cup butter, softened
1/3 cup peanut butter
1/2 cup confectioners sugar
~
Chocolate Glaze:
4 ounces semi-sweet chocolate, chopped
2 tablespoons butter
~
Line and 8x8 inch baking pan or casserole with aluminum foil, with long flaps hanging over each edge. (Don't do what I did ~ I don't like foil to come into contact with my food, so I used a small sheet of waxed paper. It isn't strong enough to lift the cookie from the dish when frozen! Next time I will use parchment paper ~ it is stronger.)

For the cookie:
Put the butter in a heatproof medium bowl. ( I used my double boiler )
Bring a saucepan filled with an inch or so of water to a very slow simmer over medium-low heat. Set the bowl over, but not touching, the water. Once the butter is melted, add the sugar and cocoa, and stir to combine. Add the egg and cook, stirring constantly with a whisk, until warm to the touch and slightly thickened (it should be about the consistency of hot fudge), about 6 minutes.(Mine was ready almost instantly, but I did continue to cook for a minute or two to cook the egg as this is a no bake cookie.) Remove from heat and stir in graham crumbs, coconut and nuts. Press the dough firmly into the prepared pan. Save the pan of water for melting the chocolate.)
For the filling:
Beat the butter, peanut butter and confectioners sugar together in a medium bowl with an electric mixer until light.

As you can see, I did not use a mixer but simply mixed it together with a spoon.
I should have sifted the sugar, as my organic powdered sugar is always lumpy,
but I am not adverse to biting into a lump of powdered sugar. :P
Spread over the cookie and freeze while you prepare the chocolate glaze.


For the glaze:
Put the chocolate and butter in a medium heatproof bowl, and set over the barely simmering water. (Again, I used my washed double boiler) Stir occasionally until melted and smooth. Remove from the heat and let cool slightly. When cool but still runny, pour the chocolate layer over the chilled peanut butter layer and carefully smooth out with an offset spatula. Freeze 30 minutes.

To serve:
Remove from the freezer and let sit at room temperature for 5 minutes.
(Mine took longer)
Pull out of the pan using the foil flaps and transfer to a cutting board. Cut into 1 inch squares with a sharp knife. Serve cool or at room temperature.


These are very rich and are more of a confection than a cookie.
They would be yummy served with ice cream.
(Everything is yummy served with ice cream!)
Store wrapped in the refrigerator or freezer.

Wednesday, February 24, 2010

Sprouted Wheat Berry Bread....

and how to sprout wheat berries!
Because, if you are going to make Sprouted
Wheat Berry Bread you will have to have
some sprouts! ;~}
*
Sprouts take 3-4 days, so plan your bread baking
accordingly.
*
Here is what you will need for sprouting ~
1 quart sized canning jar with ring/band.
cheese cloth
(or any fabric that will let water pass thru easily, or
even small mesh plastic screening)
Wheat Berries
(these can be found in the bulk food isle of your grocery store
or health food stores)
~*~

Place 1/4 cup wheat berries in the jar
and fill with barely warm water.
Put the cheese cloth over the jar and secure with ring.
Drain the water through the cheese cloth and
fill again.
Let stand for 2 hours.
Drain.
Rinse again and drain.

Place the jar on it's side.
Some people say they should be in the dark,
others say they need bright light.
I set mine on my kitchen counter under an East facing window
which only receives low light.
They grow just fine!
Rinse and drain the berries twice a day for 3-4 days
or until you have about 2 cups of sprouts.
Above ~ after 24 hours.


Above~ day 2

Evening Day 2

You will see what they looked like on the morning of day 4
below when we make bread.


When your sprouts are ready, gather your ingredients.
You will need;
1/2 C. warm water (105*-110*)
2 T. yeast
pinch of sugar or honey
2 C. whole wheat flour
1 C. nonfat dry milk powder
1 T. salt
1 1/2 C. warm water (105*-110*)
1/4 C. honey
4 T room temperature butter
2 C. sprouted wheat berries
4 1/2 - 5 cups bread flour

~*~


1. Into the 1/2 C. warm water, add your pinch of sugar or honey and
sprinkle the yeast over the water. Stir and let stand till foamy.

2. In a large bowl, add your 2 C. whole wheat flour, dry milk powder, and salt.
Combine with a whisk.


3. Add the 1 1/2 C. of warm water, honey and butter.
Mix with a wooden spoon and beat for about 1 minute.

4. Add the yeast mixture and beat for 1 more minute.


5. Add the sprouted wheat berries
(I pull them apart to more evenly distribute them.)
and add the bread flour 1 C. at a time.


You may need to dump out the dough and kneed
in the last cup or two of flour.
(It may not take all of the flour, add the last cup or two by small
amounts until the dough says that's enough!)
6. I kneed for about 10 minutes!


Just look at those tasty wheat berries and little green sprouts!
They smell like sliced cucumbers!

7. Place in a greased bowl and turn once to coat top.
Cover and let rise at warm room temp.
I let my bread rise in an oven preheated to the
lowest temperature and turned off.

8. Let rise until double ~ 1 1/2 - 2 hours.

(Sorry ~ I forgot to get a picture of the risen dough in the bowl!)

9. Turn dough out onto work surface and divide in half.
Working out the air bubbles (I use a rolling pin) shape
each half into a rectangle and roll into a loaf.


10. Placing seam side down into greased loaf pans,
let dough rise till double again, about 1 hour.


11. Bake for 35-40 minutes in a preheated 350* oven
or until bottoms of loaf sound hollow when tapped.


12. Turn loaves out on racks to cool and brush with butter.


Some say you shouldn't cut your loaf until it has completely
cooled or it will ruin the 'crumb' of the bread.
But who can resist the temptation of that heavenly scent
of fresh baked bread?
Not I!
Enjoy!